Wednesday, November 27, 2013

Blueberry Crostada with Rosemary Tangerine Glaze

Yum
The U.S. Highbush Blueberry Council has come up with a super fun new blogger recipe contest and they're calling it  "Blueberries Meet Their Match"
Entries are supposed to combine blueberries with your choice of: balsamic, rosemary, coconut or banana. For me, it wasn't a question which one I would pick to play with. I love sweet and savory combos and frequently add herbs to sweet recipes and drinks, so rosemary and blueberries it was!
This crostada is so easy to throw together and I love how impressive it looks after very little effort.
The cornmeal on the crust gives it a little texture, the blueberries are sweet, plump and deliciously juicy and it pairs so perfectly with the tangerine and rosemary in the glaze.
I see this as a perfect addition to a brunch table, especially since it is truly magnificent served with a mimosa on the side!
It's so good, my husband told me it was "the bomb" after shoveling his first slice down.....
we don't even talk like that, but I actually had to agree with him!
Blueberry Crostada with Rosemary Tangerine Glaze
1 teaspoon cornmeal
1 refrigerated pie crust
3 cups frozen blueberries
4 Tablespoons sugar
1 teaspoon tangerine zest
1 Tablespoon flour
1 teaspoon heavy cream
1/2 teaspoon finely minced fresh rosemary
1/3 cup powdered sugar
2 teaspoons tangerine juice
Pre heat oven to 400 degrees.
Sprinkle 1/2 teaspoon of the cornmeal on a large stonewear baking sheet or non stick cookie sheet.
Unroll the pie crust, lay it on top of the cornmeal and sprinkle the remaining 1/2 teaspoon cornmeal evenly across the top of the crust.
In a medium mixing bowl stir together the frozen blueberries, sugar, zest and flour. Pour the mixture in the center of the pie crust leaving a 1 inch lip around the rim uncovered.
Lift and gently fold the edges up around the filling, loosely forming with your hands.
With a pastry brush, brush a layer of the heavy cream over the pie crust.
Place in the oven and bake for 25-30 minutes.
Remove from the oven when the crust is nicely browned and allow to sit aside and cool for 30 minutes to 1 hour.
In a small bowl stir together the rosemary, powdered sugar and tangerine juice to form a glaze.
Drizzle glaze evenly over the crostada and serve.
 
If you are interested in other delicious ideas for blueberries visit here

I am SO excited to say that I won the "runner up"
$500 prize for this contest!
Thanks again to the US Highbush Blueberry Council for another fun contest!

Wednesday, October 30, 2013

Herb and Honey Goat Cheese Tart with Fig Preserves and Prosciutto di Parma

Yum

Recently I was contacted by the lovely people at Legends from Europe to try my hand at creating a dish that would highlight one of their deliciously high quality products. I jumped at the chance and was very excited to find out that my assigned ingredient was Prosciutto di Parma.
 
I mean, really, who doesn't love Prosciutto di Parma?!
I decided to make a delicious appetizer that would be perfect for the upcoming holiday season. It's delicious, impressive and totally easy and quick to make.
 

The sweet fig, creamy goat cheese and flaky pie crust make the salty deliciousness of the Prosciutto di Parma really shine!
 
Herb and Honey Goat Cheese Tart with Fig Preserves and Prosciutto di Parma
1 good quality, refrigerated prepared pie crust
4 ounces room temperature goat cheese
1 Tablespoon honey
1 1/2 teaspoon fresh lemon thyme, minced
1/4 teaspoon black pepper
1 clove garlic, finely minced
2 Tablespoons fig preserves
4 ounces thinly sliced Prosciutto di Parma
1 Tablespoon flat leaf parsley, chopped
 
First, pre heat your oven to 425 degrees. Unroll your pie crust onto a baking stone or cookie sheet. In a small mixing bowl combine the goat cheese, honey, lemon thyme, black pepper and garlic.
If you don't have lemon thyme, traditional thyme is a perfectly fine substitute. I just happen to have a gorgeous lemon thyme plant growing in my garden so that's what I cut today!
Spread the goat cheese mixture over the pie crust evenly and then place dabs of the fig preserves sporadically throughout.
Bake for 13-15 minutes or until the crust and cheese is nicely browned
Once the crust is done layer the Prosciutto di Parma on top and sprinkle with parsley
Slice and serve.
The great thing about this tart is that it is equally good warm fresh from the oven, or cooled to room temperature. If it lasts long enough to come to room temperature that is....


Tuesday, October 29, 2013

Cooking Up a Storm

Yum
It's been embarrassingly long since I've sat down to blog, but I have very good reasons, I promise!
 I have been so blessed lately, and I'd love to share a small glimpse of my food adventures and what I've been up to lately.
 
First up, is quite possibly the biggest and best. At least in the world of competitive cooking, that is. The day after my birthday I found out that I made it as a finalist in the Pillsbury Bake Off and am looking forward to leaving, in just a little over a week, to meet this guy
haha!! Yes, I finally, after 7 years of trying am going to cook for a chance to win $1 million!
To say I'm excited wouldn't even begin to describe it. At all.
Here is what I'll be making:


Then I got news that I was a finalist in the Mushroom Council's Swap it or Top It Contest 
I was lucky enough to get enough votes to win First Place!!
The prize was a $1000 Williams Sonoma gift card, a ton of Mushroom Recipe Books and an "adopt a classroom" Fruits and Veggies Matter kit for my son's classroom!
 
 
Next on the list is the Minnesota Wild Rice
The "Get Wild with Wild Rice" contest
It got wild, alright and it was a race the entire time! I wasn't able to pull through and win, but I placed as a finalist and got a hat, t-shirt, assorted recipe booklets and 3 pounds of Wild Rice for my


I also entered a fun little snack for the "One Ingredient Can Change Everything Recipe Contest" put on by Grapes of California and placed 3rd!
My PB & Pretzel Snack Sticks with Grapes won me a $100 Visa giftcard and a signed book from Ellie Kreiger!
 
And last, but certainly not least- a BIG win!
A week ago Louis and I got to go to the NY Wine and Food Festival - I still am surprised I won and was given such an amazing opportunity from Colavita, Food and Wine Magazine and al Fresco
I entered my Smoked Andouille and Date Jam Flatbread and I'm thrilled they liked it as much as I do!
 
A trip to NY (somewhere we've never been before), a few nights in a beautiful boutique hotel, tickets to the NY Wine and Food Festival, a Colavita Sampler Tote and an al fresco “bag o’ loot” plus one year of al fresco all-natural chicken sausages!!
 We wandered through walls and walls and walls of wine, spirits and gourmet samplings all day long. We watched Iron Chef Morimoto break down a tuna that weighed more than I do in about 5 minutes.
I got to meet Rachel Ray, someone I've followed and loved for years, and get a book signed by her 
 And here are the two girls from Colavita that helped make our trip so successful
 
Seriously almost too good to be true!
New York was a dream and I'm hoping that Vegas will be just as thrilling!


Monday, November 12, 2012

Menu Monday

Yum
Good morning! I hope you all had a great weekend! 
I participated in my first Holiday Open House of the season yesterday and had a great time meeting so many new people, sharing kitchen tips and easy entertaining ideas.
Today, on my Facebook page, I am sharing 5 new delicious recipes to get you through the week
will you hop over there and follow me? I post a new menu with recipes every Monday and kitchen tips throughout the week to inspire you to gather with your family around the table.
Here's the link, I hope you enjoy it!

On the Menu this Week:
Bacon, Linguini & Tomato Toss
Baja Shrimp Tostadas
Barbecue Chicken & Onion Pizza
Braised Chicken in Wine Sauce
Blackberry Balsamic Pork Stir-Fry Salad   

Sunday, November 11, 2012

Brandy Cider Sangria

Yum
It's Fall Ya'll! 
Thanksgiving is only 2 weeks away and the weather here in Austin has only teased us with a few random cool days. Mulled Cider, Hot Chocolate and Hot Toddies are going to have to wait until we aren't so hot ourselves. 
Just because Mother Nature isn't bothering to be agreeable doesn't mean that we can't have a festive drink while we gather to celebrate all that we are thankful for.
I, for one, am very thankful for this drink! 
Brandy Cider Sangria- full of cinnamon, brandy and ginger-y apple spice in a refreshing chilled cocktail.
It's sure to warm your heart and not your hands!
Brandy Cider Sangria
1 cup apple cider
1 bottle dry white wine
1/2 cup brandy
1/4 cup honey
1 granny smith apple, sliced
1 fuji apple, sliced
2 cinnamon sticks
1 inch piece of ginger, peeled

Combine all ingredients in a large pitcher and allow to chill overnight or at least 4 hours

Monday, November 5, 2012

Artichoke and Olive Crock Pot Chicken

Yum
A few weeks ago I wasn't feeling great and it took me most of the day laying on the couch before I realized that 
we had nothing in the house for dinner. Luckily, I keep a very well stocked pantry 
(so well stocked that my husband frequently complains that I am hoarding for the end of the world)
 and I was able to take a peek in my pantry and freezer, grab some of my favorite things, 
throw them in the crock pot and enjoy a delicious meal a couple hours later!
 What is your favorite crock pot meal? I can never get enough of them!

Artichoke and Olive Crock Pot Chicken 
2 pounds boneless skinless chicken breasts
salt and pepper
 1c mixed sliced olives 
2 c sliced frozen fajita veggies 
2 large garlic cloves, thinly sliced 
1 Tbsp Italian seasoning 
1/2 Tbsp fennel seed 
2 (14.5oz) can diced tomatoes  (with juice)
6 Tbsp tomato paste 
1 (14.75 oz) jar marinated artichokes (not drained)
1/4 c marinated sun dried tomatoes 
1/2 c white wine (I used Pinot Grigio)


flat leaf Italian Parsley, chopped

 Place chicken breasts in the bottom of the crock pot. Generously salt and pepper them and then 
layer the remaining ingredients on top of the chicken. Cook on low for 4-6 hours. When ready to serve, 
stir in the parsley and place over rice or pasta.

Tuesday, October 30, 2012

Granola Chai Muffins

Yum
 I love Costco, and even though I technically don't NEED a whole pallet of toilet paper I love getting a good deal when I can find one. I recently purchased a large box of Pumpkin Flax granola thinking that I would use it as cereal for the kids in the morning and to make parfaits with yogurt and fruit. But, as much as I tried to push it,  my kids just are not going for it. So that leaves me challenged with sneaking healthy pumpkin flax granola into baked goods so they don't know that they are eating it.
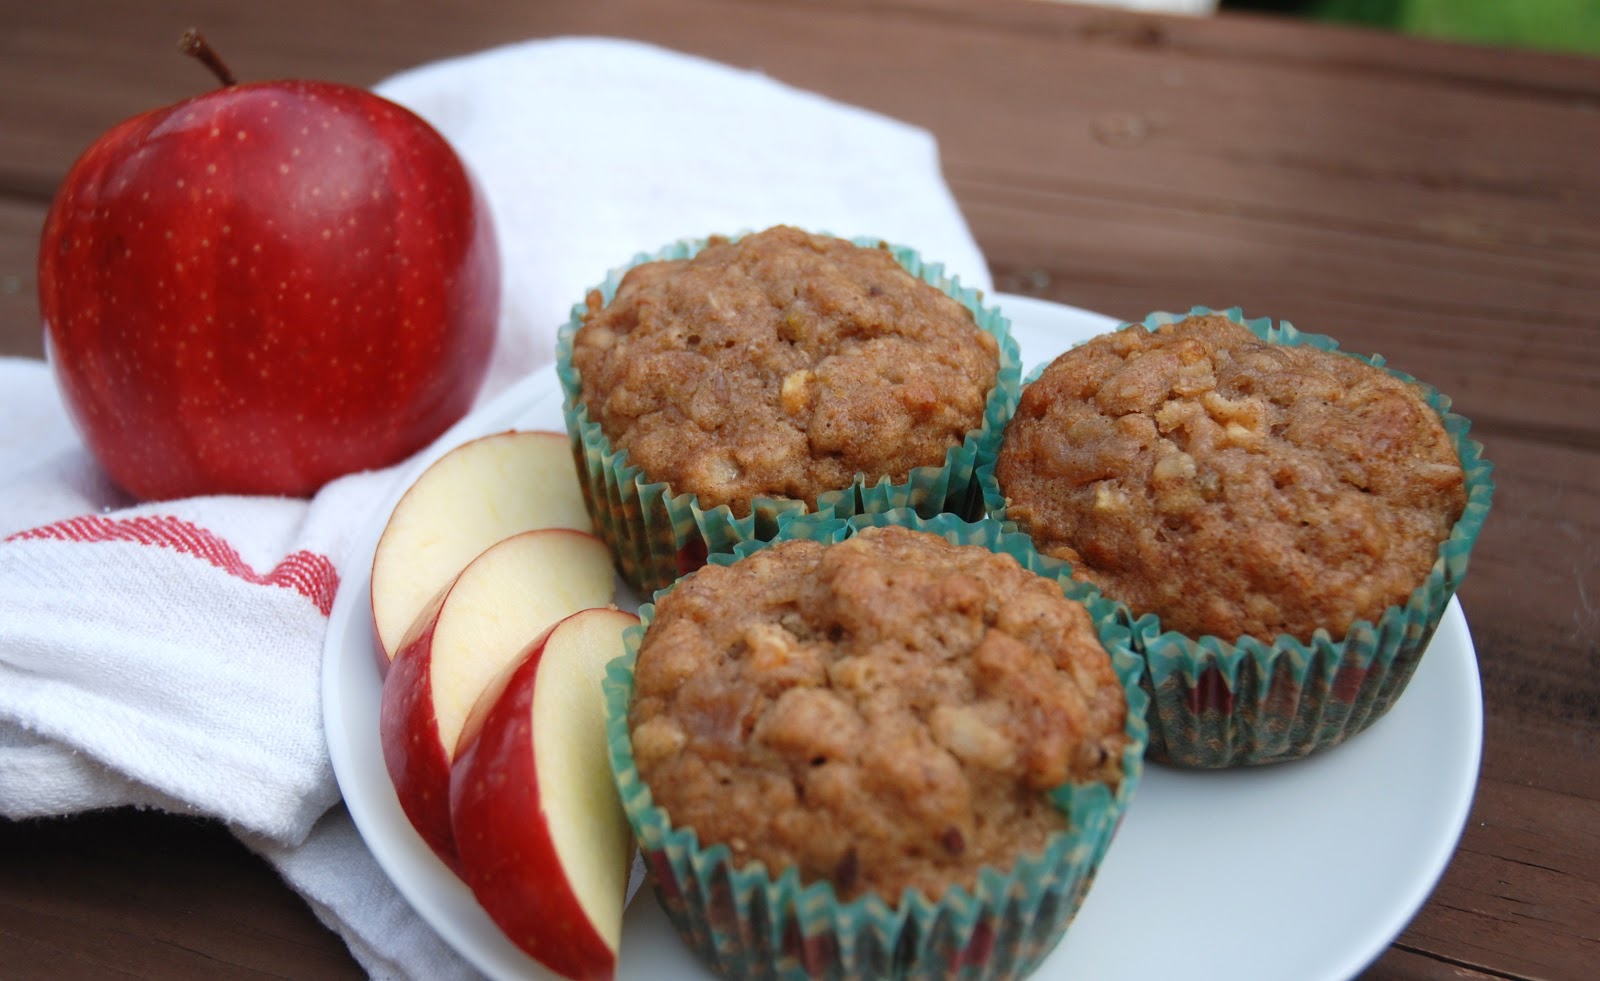
And I am happy to tell you that I have succeeded. I took some of my granola and soaked it in chai tea concentrate (another delicious Costco find) and put it in these muffins with raisins, honey and buttermilk. They are not overly sweet and are really delicious warm!
I hope you enjoy these as much as my family does!

Granola Chai Muffins
1 cup granola (I use Nature's Path Pumpkin Flax Granola)
1/2 cup Chai tea concentrate (I use Tazo Chai Tea Latte Concentrate)
1/4 cup vegetable oil
1/4 cup honey
1 tsp vanilla
2 eggs
1/2 cup buttermilk
1 cup whole wheat flour
1/2 tsp baking soda
2 tsp baking powder
1/4 tsp salt
1 cup raisins

In a small bowl combine the granola and chai tea concentrate and allow to sit for 20-30 minutes.
Preheat oven to 400 degrees and spray muffin pan with cooking spray or use liners.
In a large bowl pour the chai granola mixture with the oil, honey, vanilla, eggs, and buttermilk and mix until combined.
In a separate bowl measure and whisk the dry ingredients together. Mix all ingredients together until combined. Spoon muffin mixture into muffin pan. Bake for 20-25 minutes or until done.

Monday, October 29, 2012

Maple Apple Oat Muffins

Yum
 Maple, Apples, Oats and Granola all come together to make one amazing fall breakfast when you are on the go. My kids gobbled these up and I think this is on the top of their list of favorite muffins that we've made. I had homemade applesauce left over from crock pot applesauce we had made earlier in the week, but feel free to use store bought applesauce or totally change it up and use a different fruit puree. Bananas, pumpkin and even sweet potato would be a great substitute for the applesauce!
I say smile, and at least one of them makes a face....what can I say?!
My apple peeler/corer/slicer made such an easy job of breaking down the apples, and the kids love to use it. The apple comes out in a spiral which is a fun snack all on its own!
Maple Apple Oat Muffins
1/2 cup sugar
3 oz maple syrup
2 large eggs
1/3 cup vegetable oil
1 teaspoon vanilla 
1/2 cup Whole Wheat Flour
1 cup All-Purpose Flour
1/4 teaspoon baking powder
1/2 teaspoon baking soda
2 teaspoons cinnamon spice blend
1/2 teaspoon salt
1/2 cup rolled oats
3/4 cup applesauce
1/2 cup granola
In a large bowl, mix together the sugar, maple syrup, eggs, oil and vanilla. In a separate bowl, mix together the flours, baking powder and soda, and cinnamon spice blend, and add them to the wet ingredients in the bowl. Mix in the oats, applesauce, and granola. 
Pour the mixture into muffin liners, and bake in a preheated 350°F oven 17 to 22 minutes, until a toothpick comes out clean when tested. Remove the muffins from the oven, and cool completely.  
Yield: 16 muffins  recipe adapted from here 

Be sure to visit my Pampered Chef Facebook Page as well, where I post a new menu each Monday to get you through the week without ever having to wonder what you should make for dinner!

Wednesday, October 10, 2012

Yummly Love

Yum
It goes without saying that my blog has been neglected lately. 
I knew that my son starting kindergarten would make him tired and very busy, but I had NO IDEA how much him starting school would affect my schedule! Between having a ton of fun with my Pampered Chef business, new kindergarten routine for M, new pre-school for B, swim lessons and soccer twice a week we are always on the go and by the time I would be able to photograph any food to share, it's dark outside!

Yesterday I received a very unexpected note letting me know that my
was featured on Yummly! A totally unexpected fun surprise which was the perfect thing to nudge me along and get back to blogging!

Thanks so much Yummly for featuring my soup, I can't wait to try out all of the other delicious soups included in your "Simple Soups to Warm You Up This Season" feature! It's perfect for this newly cool weather we've been enjoying!
Now, please don't judge me by the quality of this picture- remember how I said it's dark by the time we're eating?!
This is one of my new favorite "crazy busy day" meals that is so easy, healthy and delicious I promise you will love it!
In the morning I made the tzatziki sauce in my Manual Food Processor, one of my Pampered Chef faves, and threw it in the fridge. (If you don't have one of these and want one- email me, I can help you get one for a discount or free!!) Then when we got home all I had to do was cook the fish, warm the tortillas in the microwave and assemble the salads. Dinner was done in 15 minutes!

Greek Isles Fish Tacos
Easy Tzatziki Sauce:
1 garlic clove
¼ cup red onion
1 teaspoon salt
½ teaspoon pepper
½ of a cucumber seeded and peeled
Juice of ½ lime
1 cup fat free plain greek yogurt
1 teaspoon Pampered Chef All Purpose Dill Seasoning

1 pound cod (or any firm white fish)
Salt and pepper
Pampered Chef Greek Seasoning

8 Flour tortillas
½ cup kalamata olives, sliced
2 cups salad greens

Place the garlic and red onion in the manual food processor. Pump the handle 3-5 times until diced. Add salt, pepper, cucumber, lime juice, yogurt and dill seasoning. Pump the handle 5-8 times until everything is mixed and place in the fridge until dinner is ready.

Season fish with salt, pepper and Greek rub. Heat a grill pan or large non-stick skillet on medium high heat and spray with kitchen spritzer. Cook fish 4-7 minutes per side until flaky, turning only once.

Once fish is cooked, put in warm tortillas with salad greens, top with Tzatziki sauce and olives and serve.

Tuesday, August 21, 2012

Bells Will Be Ringing

Yum
Do you hear that?
It's the sound of school bells and early alarm clocks.

My son started kindergarten last week and it has been a wonderful experience so far. He was so excited the first day he got up and was dressed before I got in his room in the morning.......let's see how long that lasts!
I have never been a morning person (and in general never really feel fully awake before 10am) so this early morning having to be at school on time every day thing is very new to me. Kindergarten is a whole new world compared to the relaxed schedule of the two day a week pre-school down the street that we are used to.

One of the things I'm most passionate about is what my kids eat
and being on a new (up before the sun comes up) schedule is really challenging the way I feed my kids breakfast. I no longer have a lot of time to cook something right before running out of the door but that doesn't mean that they can't get a great nutritional start to their day. Going from a half day program to a week long full day schedule is exhausting for little ones which makes it even more important that they get a great breakfast before that bell rings.

 I grabbed one of these containers from the Target dollar section to help with those mornings that we are running a little slower than normal and fill it with healthy delicious breakfast treats the kids can munch on in the car. One of the newest bars I made are a chocolate peanut butter banana protein bar. I filled it with some of the kids' favorite flavors and, once they were baked, wrapped them individually. All I need to do is grab them on the way out of the door!
Chocolate Banana Breakfast Bars
  • 1 1/2 cups rolled oats
  • 1/3 cup whole wheat flour
  • 1/2 cup chocolate protein powder
  • 1 1/2 teaspoon Cinnamon Plus Spice Blend
  • 1/4 teaspoon salt
  • 1/2 teaspoon vanilla
  • 1/2 cup mashed banana
  • 1/4 cup almond butter
  • 1/4 cup honey
  • 2 Tbsp flax seed

  • 1. Preheat oven to 350F.
    2. In a medium-sized bowl combine oats, flour, protein powder, cinnamon, and salt.
    3. In a separate bowl, combine mashed banana, almond butter, honey, and vanilla.
    4. Add wet ingredients to dry ingredients and mix well.
    5. Spread evenly onto a medium bar pan and bake for 10-12 minutes or until edges start to turn brown
    6. Allow to cool 10 minutes before slicing.
    7. Store in an air-tight container for up to a week or wrap tightly in plastic wrap and freeze.

    What are your favorite grab and go treats?


    Tuesday, August 7, 2012

    Star Wars 6th Birthday

    Yum
     Every year I look forward to this moment. The "first glance at the cake" moment. 
    The one second that makes all my pre-party stress totally worth it.
    I am like almost every other mother I know; we put tremendous pressure on ourselves to make our children's parties "perfect"....whatever that means. 
    And as I was decorating his cake this year I was realizing that I'm not going to be able to do my little tradition much longer. Every year I have completely hidden the cake from Marshall until right before his party, had him walk in when it's completely finished and gotten a picture of his face when he first sees it. It is something that I adore, seeing the excitement and joy in his face when getting the first glance at something that I have poured my heart into especially for him. 
     The older he gets the harder it is to pull this off. It takes hours to make his cakes and he needs to be gone or asleep for me to work on it. And keeping him away from the fridge where I am hiding it is a job itself. But I am so grateful for one more year of cake surprises and he was just as enthusiastic as I hoped he would be.
      Marshall is completely and utterly obsessed with Star Wars, so there was really no other choice for the theme of this party. For the cake I did a Millennium Falcon out of chocolate cake and vanilla icing.
     The party was at the Austin Children's Museum and I think everyone had a great time! I got the idea for the lightsaber utensil/napkins on pintrest and filled Yoda cups with bounce balls, candy, glow sticks, stickers and chalk for the favors
     The cake was chocolate and the cupcakes were vanilla
    I got the idea for the chocolate covered lightsaber pretzel rods here
     I went a lot simpler this year with the food than I have in previous years. Han Solo Roll Ups for the adults (whole wheat wraps with ham, havarti cheese, spring mix greens and a spread I made out of sun dried tomatoes, mayo, garlic and a Pampered Chef Parmesan Garlic seasoning) and Jar Jar Links (crescent wrapped turkey little smokies) for the kids
     PB&J bombers that I cut out with these sandwich cutters and the cupcake decorating set from here. Luckily for me I live very close to a Williams-Sonoma outlet and was able to get all of these items on clearance!
     Droid Dip and Vader Veggies
    Yoda Melon, Trooper Scoopers and Jawa Juice

     The birthday Jedi ready for some cake and Princess Brianna with her Leia buns
     Make a wish!!
     
     I love random pictures when you see all of your guests having fun!
     As we were cleaning up Brianna had to put herself at the head of the table and pretend it was her day, even if ti was only for 5 minutes
    Once we got home Marshall got to open his gifts and I got to relax with a glass of wine. We were both happy!
    I have always found it stressful to open gifts in front of people. You never know what potentially embarrassing things kids will say, like "I didn't want this" or "that's it?" or when you receive three of the same item.  Do you open gifts at parties or do you wait till you get home?


    " Truly wonderful, the mind of a child is"
    -Yoda

    Jalapeno Popper Pot Pies

    Pot Pie is the kind of dish that feels made for a Sunday Supper and this one is no exception. It’s creamy, comforting, and a little spicy – ...